Nail Tool How-To: Sterilization
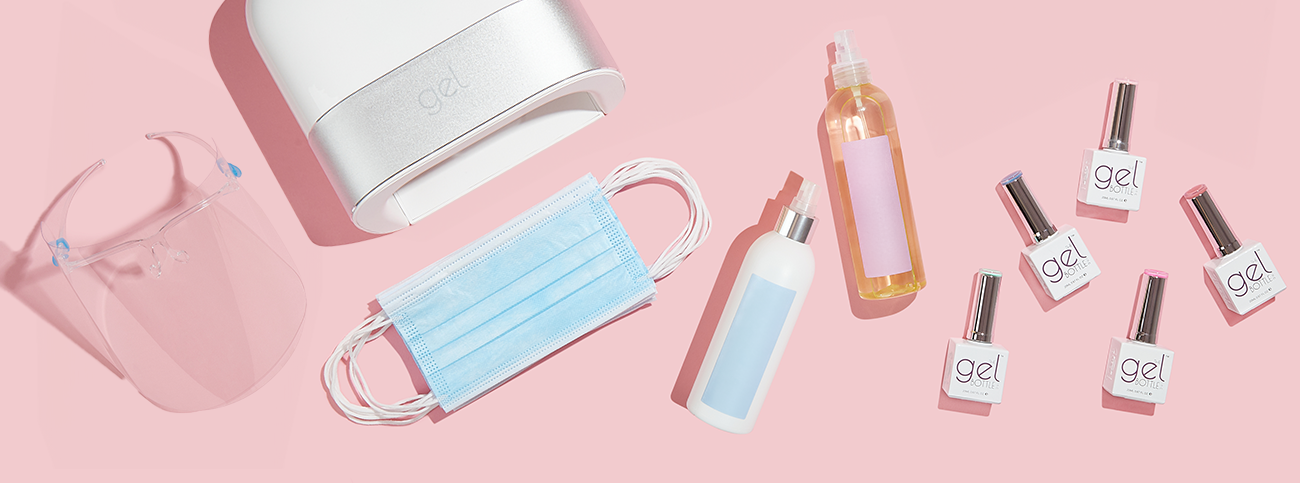
Promoting hygiene habits and prioritizing safety for clients are a couple reasons why — even if you’re a seasoned pro — refreshing your knowledge on sanitary salon environments is crucial. Here is a reminder on how to sterilize nail clippers and other tools.
Why Sterilization Matters for Clean Nail Tools

Sterilizing is meant to get rid of microorganisms and helps prevent the transmission of bacteria, fungi, and other viruses that can lurk on nail clippers, files, and pushers. These can cause infections like nail fungus, athlete's foot, and more serious reactions.
Proper sterilization is more than just cleaning with soap and water.
- Always sterilize between use.
- Using hospital-grade disinfectants or autoclaves helps remove these harmful microbes.
Last, but not least, most people today expect nail professionals to uphold high standards of hygiene to ensure a pleasant experience.
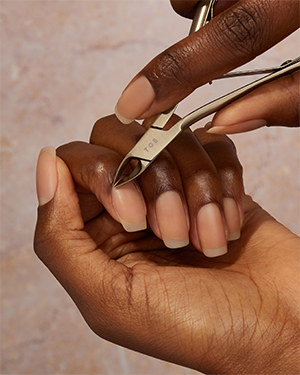
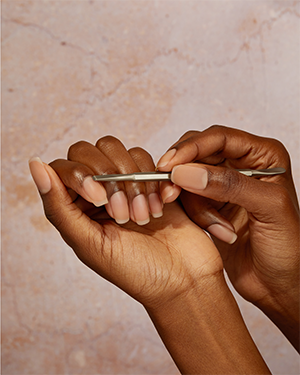
How To Sterilize Nail Clippers
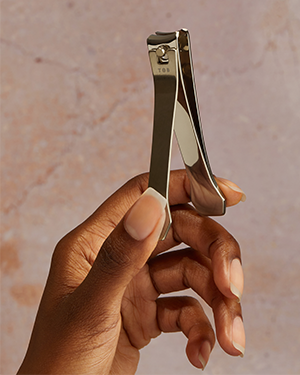
Maintaining sterile nail tools prevents the spreading of germs and assures happy nails. Here's a breakdown of the different methods to sterilize nail tools, including nail clippers, cuticle nippers, cuticle pushers, and nail scissors.
- Autoclaves: For professional-grade sterilization, consider an autoclave. This medical-grade device uses pressurized steam and thoroughly eliminates traces of bacteria, fungi, and viruses.
- Alcohol soak: This can be an effective method for most nail tools. Dip your clippers and other tools in a container filled with at least 70% of isopropyl alcohol solution. Ensure the tools are completely covered, and let them soak for about 30 minutes or more. Alcohol kills bacteria and viruses and is a great choice for regular sterilization.
- Boiling water: Boil your nail tools to help sanitize them. Keep in mind that this method is best reserved for sturdy metal tools. It may not be suitable for delicate tools or those with plastic components as the heat can cause warping or damage. Fill a pot with clean water, and bring it to a full boil. Carefully place your tools in the boiling water for at least 10 minutes. The intense heat can help eliminate any microbes present.
Pro tip: No matter what method you choose, clean your tools with soap and water before sterilization. This will help remove any visible dirt that hinders the productivity of the sterilization process.
Tips for Tool Hygiene
Knowing how to sterilize nail tools is key, but here are other tips to maintain your tools:
- Dry thoroughly: For sterile tools, moisture is a no-go. After sterilization, keep your tools completely dry to prevent rust or corrosion.
- Do not share personal tools: Sharing isn't always caring. To minimize infection risk, use your own sterilized tools, and avoid sharing them.
- Store properly: Keep your sterilized tools secure and away from dust and contamination. Store in a clean, dry container, drawer, or case.
- Clean your space: Don't forget the workspace! Regularly disinfect the places where you perform your nail routine and services with disinfectant wipes.
When To Toss Your Tools

Even the best sterilized nail tools do not last forever. Here are signs it is time to throw them out:
- Signs of Wear and Tear: Keep an eye for damage like rust spots, chipped edges, or dull blades. They can retain bacteria and make it harder to achieve a clean service. Sterilization can't mend physical damage.
- Hygiene: If your tools have ever been dropped or come into contact with blood or any other bodily fluids, then consider them compromised. Sterilization can help clean the tools, but complete safety cannot be guaranteed.
The best choice in these cases is to toss them out, and get new sterile ones.
Keeping It Clean: A Sterilization Checklist
Here’s a handy checklist to print off and put in your salon or workstation for you and your colleagues:
- Presterilization Clean:
- Wash your hands thoroughly with soap and water.
- Gather your nail tools (files, clippers, pushers, etc.).
- Use warm, soapy water and a soft brush to scrub your tools and remove dirt or nail residue.
- Sterilization Method (Select the sterilization method that works best for the way you work):
- Alcohol soak: Dunk your tools in at least 70% isopropyl alcohol solution for a minimum of 30 minutes. Consider purchasing multiple sets so you always have one clean set while the others soak.
- Boiling water: For a more robust clean, boil the tools for five to 10 minutes. (Note: Not suitable for delicate tools.)
- Autoclave: For professional-grade sterilization, use an autoclave.
- Drying:
- After sterilization, ensure your tools are completely dry. Residual moisture leads to rust or corrosion.
- Use a clean cloth to dry them thoroughly, or allow them to air dry completely.
- Secure Storage:
- Keep your sterilized tools safe from dust and contamination.
- Store them in a clean, dry container, drawer, or case.
- Avoid storing them in damp environments like bathrooms.
Hygiene is key to nail and spa care, especially at professional salons. So, ensure you regularly clean and maintain your products and workspace.